Golden Sponge Cake with Caramelized Fruit
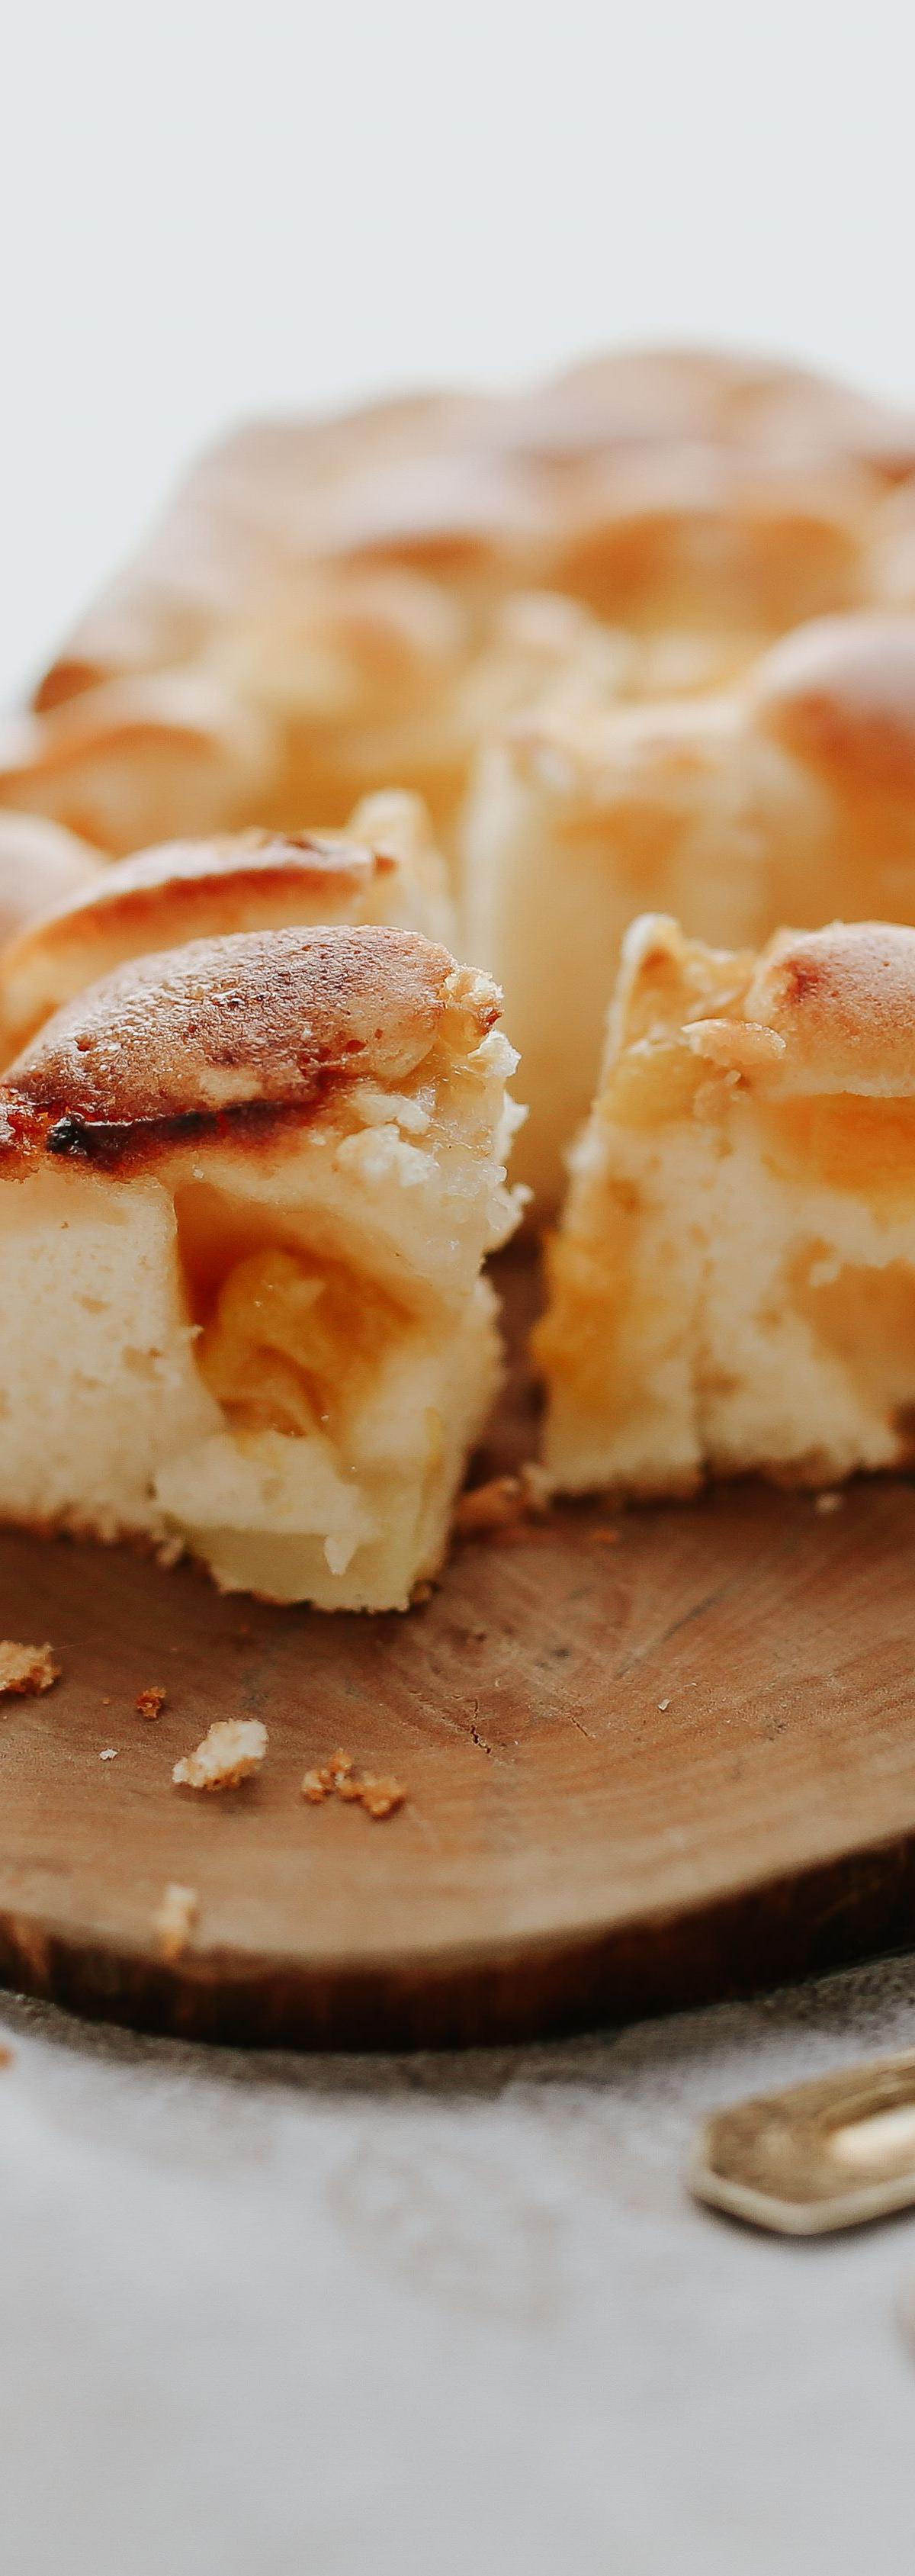
This pillowy, cloud-like sponge cake is baked with jammy, caramelized fruit nestled right into the batter, creating golden, sticky pockets of sweetness across the top. The interior is impossibly soft and airy — like biting into a warm, fragrant pillow — while the edges turn beautifully burnished and crisp. It's the kind of humble, rustic bake that looks effortless but delivers pure, comforting flavor with every square.
- Total time
- 75 min
- Servings
- 9
- Calories
- 285
- Protein
- 6g
Ingredients
- 3 medium (about 1 lb / 450g total) firm, ripe peaches or apricots, peeled, pitted, and sliced into 1/2-inch wedges
- 2 tbsp granulated sugar
- 1 tbsp unsalted butter
- 1 tbsp fresh lemon juice
- 1 1/2 cups (190g) all-purpose flour, sifted
- 1 1/2 tsp baking powder
- 1/4 tsp fine kosher salt
- 4 whole large eggs, at room temperature
- 3/4 cup (150g) granulated sugar
- 1/2 cup (120g) full-fat sour cream, at room temperature
- 1/4 cup (60ml) whole milk, at room temperature
- 4 tbsp (55g) unsalted butter, melted and cooled slightly
- 1 1/2 tsp pure vanilla extract
- 1 tbsp unsalted butter, softened (for greasing the pan)
- 1 tbsp all-purpose flour (for dusting the pan)
- 1 tbsp powdered (icing) sugar, for dusting (optional)
Instructions
- 1
Position an oven rack in the center of your oven and preheat to 350°F (175°C). Allow at least 20 minutes for the oven to fully come to temperature — an under-preheated oven will cause the sponge to collapse rather than rise tall and proud.
- 2
Grease your 9x9-inch square baking pan thoroughly with 1 tbsp softened butter, making sure to coat the corners and up the sides. Dust with 1 tbsp flour, tilting the pan to coat all surfaces evenly, then tap out any excess. This double-protection ensures the delicate sponge releases cleanly. Set aside.
- 3
Remove your eggs, sour cream, and milk from the refrigerator now so they can come to room temperature (about 20 minutes). Room-temperature dairy and eggs incorporate more smoothly and produce a taller, more even sponge — cold eggs especially can cause the batter to curdle or deflate when beaten.
- 4
Prepare the fruit: Peel, pit, and slice your peaches or apricots into 1/2-inch wedges. In a small skillet over medium heat, melt 1 tbsp unsalted butter until it begins to foam, about 1 minute. Add the sliced fruit, 2 tbsp granulated sugar, and 1 tbsp lemon juice. Stir gently once to coat, then let the fruit cook undisturbed for 2–3 minutes until it softens slightly and the sugar begins to caramelize to a golden amber color around the edges. You should smell a sweet, jammy fragrance. Remove from heat and let the fruit cool to room temperature — hot fruit will steam and deflate your batter if added too warm.
- 5
Sift together the 1 1/2 cups all-purpose flour, 1 1/2 tsp baking powder, and 1/4 tsp kosher salt into a medium mixing bowl. Sifting is essential here — it aerates the flour and ensures no lumps sneak into the delicate batter. Set aside.
- 6
In the large bowl of your stand mixer fitted with the whisk attachment (or use a large bowl with an electric hand mixer), combine the 4 room-temperature eggs and 3/4 cup granulated sugar. Beat on medium-high speed for 5–7 full minutes. This is the most critical step: you are building the airy structure of the sponge entirely from whipped egg foam. After 5–7 minutes, the mixture should have tripled in volume, turned pale ivory, and fall from the beaters in thick, slow ribbons that hold their shape on the surface for 3–4 seconds before dissolving. Do not rush this step.
- 7
Reduce mixer speed to low. Add the 1 1/2 tsp vanilla extract, 1/2 cup sour cream, and 1/4 cup whole milk. Mix only until just combined, about 30 seconds — overmixing now will deflate the precious foam you just built. The batter may look slightly curdled at this point; that is completely normal.
- 8
With the mixer still on low, drizzle in the 4 tbsp melted, cooled butter in a thin, steady stream. Mix just until the butter is absorbed, about 20 seconds. Turn the mixer off immediately.
- 9
Remove the bowl from the mixer. Using a large rubber spatula, gently fold in the sifted flour mixture in three additions: sprinkle one-third of the flour over the batter and fold with slow, wide strokes — cutting down through the center, sweeping along the bottom, and lifting up the batter over the top. Rotate the bowl 90° and repeat. Add the second and third portions of flour the same way. Stop folding the moment no dry streaks of flour remain. The batter should be thick, voluminous, and silky — like a luxurious cloud. Over-folding will deflate the air bubbles and produce a dense, gummy cake.
- 10
Pour the batter into the prepared 9x9-inch pan and use your offset spatula to spread it gently into an even layer, being careful not to deflate the batter with aggressive pressing. The batter will be thick enough to hold its shape.
- 11
Distribute the cooled caramelized fruit pieces evenly across the top of the batter, pressing each piece very lightly so it is just nestled into the surface — do not push the fruit down into the batter. The fruit will sink slightly during baking and create those characteristic golden, jammy pockets visible in the finished cake. Pour any caramelized syrup remaining in the skillet over the top of the fruit for extra flavor.
- 12
Bake on the center rack at 350°F (175°C) for 35–42 minutes. At the 30-minute mark, check the color: the top should be turning a deep golden brown, with the fruit caramelizing further and the edges pulling away from the sides of the pan. The surface should appear set and spring back gently when lightly pressed in the center. At 35 minutes, insert a toothpick or wooden skewer into the center of the cake — it should come out clean or with just a few moist crumbs clinging to it (not wet batter). If the top is browning too quickly before the center is done, loosely tent the pan with aluminum foil and continue baking. Do not open the oven door before 30 minutes, as the cold rush of air can cause the sponge to sink.
- 13
Remove the cake from the oven. The pan will be very hot — use oven mitts. Set the pan on a cooling rack and allow the cake to cool in the pan for 15 minutes. You will hear the cake gently pulling away from the edges as it cools — this is a good sign.
- 14
After 15 minutes, run your offset spatula or a butter knife carefully around the edges of the pan to loosen the cake. Place a flat cutting board or large plate over the pan, then confidently invert both together in one smooth motion. Lift the pan away. If the cake sticks, give it a gentle tap on the bottom. Place your serving board or plate on the bottom of the inverted cake and flip it right-side-up again so the golden fruit faces upward.
- 15
Allow the cake to cool for at least an additional 15–20 minutes before cutting — slicing a hot sponge compresses it and the interior will appear gummy and underdone even when fully baked. Once cooled to warm or room temperature, use a sharp chef's knife to cut the cake into 9 squares (a 3x3 grid). For extra clean cuts, wipe the knife blade with a damp cloth between slices. Dust lightly with 1 tbsp powdered sugar if desired. Serve squares with a cold glass of milk, as pictured.
Tools you’ll need
- 9x9-inch square baking pan
- stand mixer or electric hand mixer
- large mixing bowl
- medium mixing bowl
- fine-mesh sieve or flour sifter
- rubber spatula
- offset spatula or butter knife
- cooling rack
- sharp chef's knife
- cutting board
- measuring cups and spoons
- toothpick or wooden skewer
Cook smarter
Get matched recipes for what’s in your fridge
Custrd is a free iOS app that finds real recipes from the ingredients you already have. No more grocery-list aspirations.